


")


Asthma is a chronic respiratory disorder that obstructs normal breathing and, at times, leads to hyperventilation and wheezing. Inhalers and breathing devices are undoubtedly very important tools for dealing with symptoms, but yoga asanas for asthma relief have also shown long-term positive impacts on improving respiratory function and well-being.
Having asthma can often mean avoiding certain activities because they might trigger another attack or related anxiety, which significantly affects your lifestyle and daily routines.
Dr. Nicola Hanania, Director of the Airways Clinical Research Center at Baylor College of Medicine, emphasizes the importance of integrating complementary therapies like yoga with conventional asthma treatments. He notes, “When you get an asthma attack, it’s like drowning—it’s the worst feeling ever.” If a complementary therapy “is not negatively affecting their well-being, or they’re not spending too much, I’m not dismissive.”
A 2024 randomized controlled trial on 165 mild-moderate asthma patients found that 13 weeks of adjuvant yoga therapy significantly improved Asthma Control Test scores and reduced exacerbations versus non-yoga controls.
If you are prevented from performing normal daily tasks due to asthma symptoms, you should explore the possibility of practicing yoga for asthma. With regular practice, yoga can help increase lung capacity, promote relaxation, and reduce the frequency of attacks.
This article explores 10 yoga asanas and pranayama techniques that can help manage asthma symptoms effectively.
Also, Read: The Ultimate Guide to Yoga Blocks: 6 Options Reviewed

Expert Choice: Best At-Home Yoga Studio
Experience over 2,400 world-class yoga classes from the comfort of your home. YogaDownload offers expert-led programs and flexible membership options for every fitness level.
*Purchases through this link support our research at no extra cost to you.
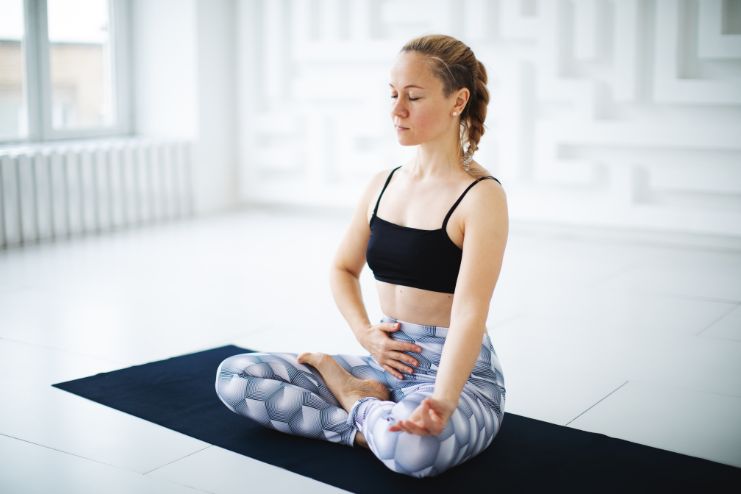
1. Nadi Shodhan Pranayama (Alternate Nostril Breathing)

Etymology
- Nadi – Subtle Energy Channel
- Shodhan – Purification
- Pranayama – Breathing Technique
Also known as Anulom Vilom Pranayama, this technique purifies the subtle energy channels (nadis), calms the mind, and enhances oxygen flow throughout the body. It’s particularly beneficial for asthma patients as it reduces instances of shortness of breath and promotes relaxation.
How to Practice:
- Spread a yoga mat on the ground.
- Sit comfortably with your back and spine erect, and your shoulders relaxed.
- Calm your mind and try to maintain a gentle smile to relax your face.
- Rest your left hand on your left knee with the palm facing upward.
- Raise your right hand, and gently place your index and middle fingers between your eyebrows.
- Close your right nostril with your right thumb and inhale deeply through the left nostril.
- Close the left nostril with your right ring finger, release the right nostril, and exhale slowly.
- Inhale through the right nostril, close it, and exhale through the left nostril. This is one round.
- Continue this pattern for nine rounds.
- Keep your eyes closed throughout the practice, and focus at the center of your forehead to enhance concentration.
2. Kapal Bhati Pranayama (Skull Shining Breath)
Etymology
- Kapal – Forehead
- Bhati – Shining
- Pranayama – Breathing technique
While most people focus primarily on the abdominal action, Kapal Bhati helps flush out toxins from the body, purifying and revitalizing the system. This energizing breathing technique clears the respiratory passages, improves lung function, and detoxifies the body. It also helps alleviate respiratory problems associated with asthma.
How to Practice:
- Sit with a straight spine and place your hands on your knees, palms facing up.
- Take a deep breath in through your nose.
- As you breathe out, draw the stomach in toward the spine as much as the body allows, without overdoing it.
- Place your hand on the abdomen to connect and feel the abdominal muscles working.
- Inhale deeply, then exhale forcefully through the nose while drawing the abdomen inward.
- Allow the inhalation to occur passively.
- Repeat for 20 rounds, gradually increasing the duration as you become more comfortable.
- After the first round, relax for a few minutes with your eyes closed.
- Then, repeat two more sets of the same process.
Also, Read: Why Athletes Swear by Yoga Nidra for Faster Recovery
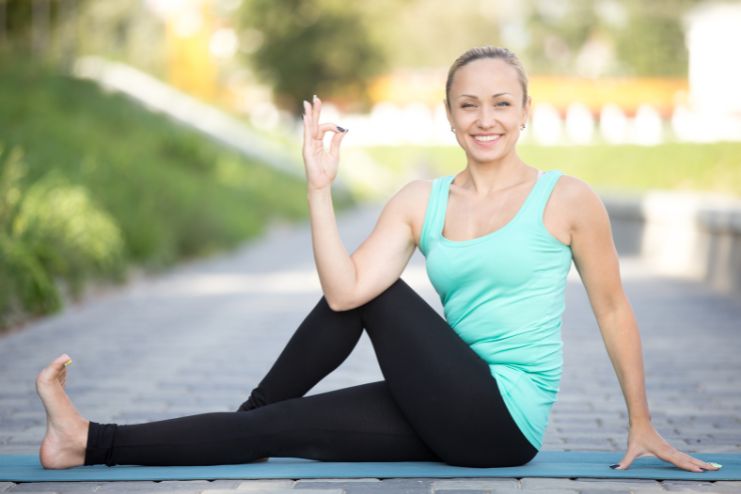
3. Ardha Matsyendrasana (Half Lord of the Fishes Pose)
Etymology
- Ardha – Half
- Matsyendra – King of the Fishes
- Asana – Yoga Pose
Ardha Matsyendrasana is one of the lesser-known yoga asanas for asthma relief. This seated spinal twist opens the chest, expands the rib cage, and improves lung capacity, aiding in better oxygenation and easier breathing.
How to Practice:
- Place a yoga mat on the floor and sit with your legs extended in front of you.
- Feet should be placed together, and the spine should be erect and straight.
- Bend your left leg and move your heel toward your right hip.
- Then cross the right leg over the left, keeping the right foot next to the left knee.
- Place your left hand on your right knee, and extend your right hand behind you for support.
- Gently twist the upper body—waist, shoulders, and neck—towards the right and inhale, looking over the right shoulder.
- Keep your spine erect in this position.
- Hold that position while breathing evenly in and out.
- As you exhale, slowly bring the right hand forward, untwist your waist, and release your neck and chest, allowing your body to relax.
- Repeat the sequence on the opposite side.
Expert Choice: Best At-Home Yoga Studio
Experience over 2,400 world-class yoga classes from the comfort of your home. YogaDownload offers expert-led programs and flexible membership options for every fitness level.
*Purchases through this link support our research at no extra cost to you.
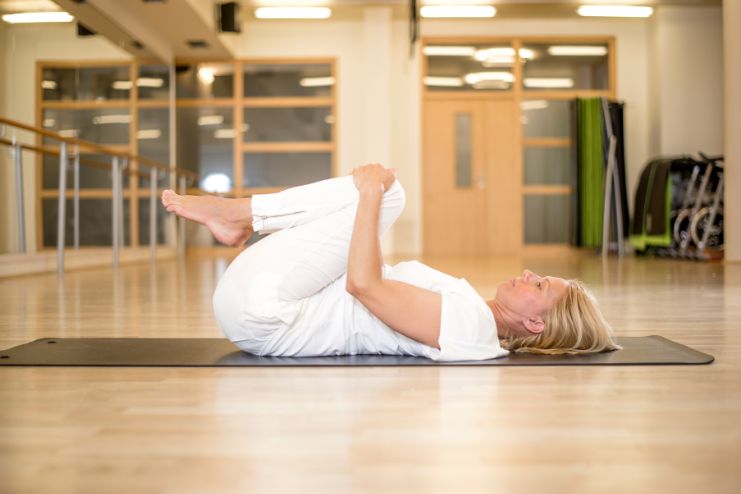
4. Pavanamuktasana (Wind-Relieving Pose)
Etymology
- Pavana – wind
- Mukta – release
- Asana – yoga pose
Pavanamuktasana, while primarily known for aiding digestion, enhances blood circulation, ensuring better oxygen supply to all organs, which supports overall respiratory health. As the body boosts blood circulation, all organs stay well oxygenated, thereby minimizing the chances of asthma attacks.
How to Practice:
- Set a yoga mat on the floor.
- Lie on a mat with your feet together and your arms resting along the sides.
- Breathe in through your nose deeply.
- As you’re ready to breathe out, bend your knees and draw them towards your chest while resting your thigh across your abdomen. Hold the knees firmly with both arms.
- Inhale again. And upon exhaling, lift your head and your chest off the surface. Try bringing the chin toward the knees.
- Hold this position for as long as is comfortable while continuing to breathe slowly and steadily.
- As you exhale, slowly let go of your legs and return to the original position.
- Repeat for 3 to 5 rounds for the best results.
- If you’re new to yoga, practice this one leg at a time, before gradually moving to both.
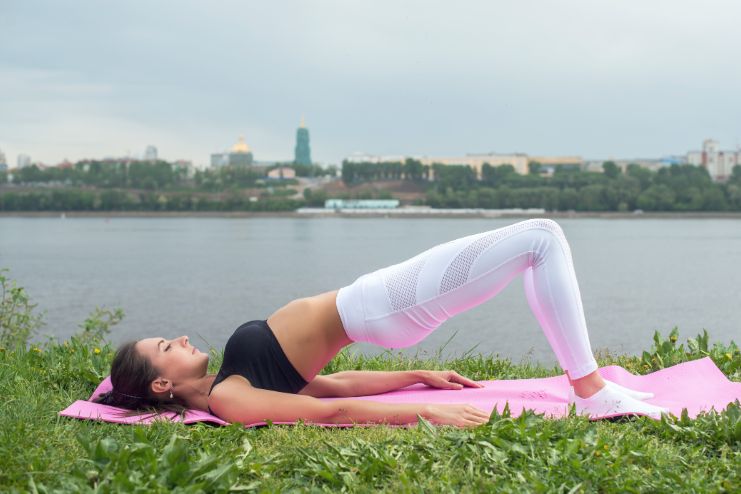
5. Setu Bandhasana (Bridge Pose)
Etymology
- Setu – bridge
- Bandha – lock
- Asana – yoga pose
The Setu Bandhasana gets its name from how the pose resembles a “locked bridge.” It is considered one of the most effective yoga poses to relieve asthma and thyroid-related concerns. It also boosts digestion and helps stretch the muscles of the back and chest.
This backbend opens the chest and lungs, improves blood circulation, and strengthens the back muscles, contributing to better respiratory function.
How to Practice:
- Lay the yoga mat on the floor and lie down on it.
- Bend your knees and keep your feet about 10–12 inches away from your hips.
- Now, bring the feet together. The knees and ankles should be in a straight line.
- Let your arms rest alongside your body, with your palms facing down.
- Breathe in deeply and lift your lower, middle, and upper back off the floor.
- The weight of the body should rest on the shoulders, with the chest lifted toward the chin, but without dropping the chin down.
- Tighten the glutes, ensuring the thighs remain parallel to the ground.
- Clasp your hands under your back and hold for several breaths.
- Maintain the asana for as long as comfortable, preferably one to two minutes.
- Exhale and slowly lower the back onto the mat to come out of it.
Also, Read: What Is Somatic Yoga? A Beginner’s Guide to This Gentle Movement Practice
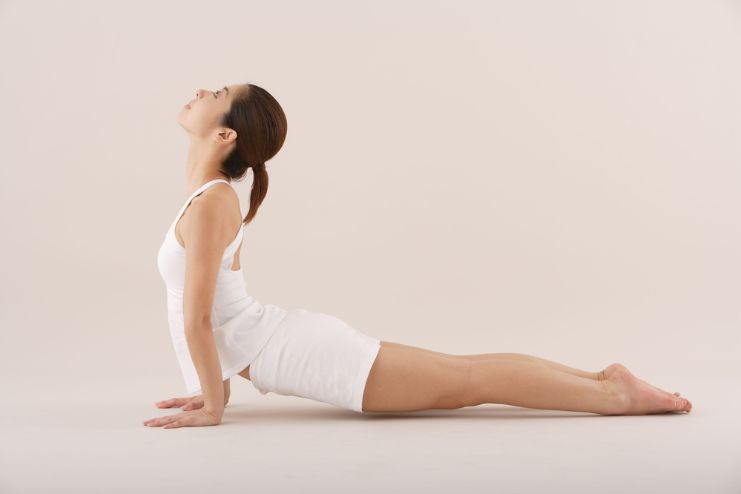
6. Bhujangasana (Cobra Pose)
Etymology
- Bhujang – Snake
- Asana – Yoga pose
The Bhujangasana gets its name from the posture that resembles a cobra with its hood raised. This pose opens the shoulders and chest, allowing the lungs to expand better and resulting in easier and more effective breathing. Blood circulation is also enhanced, enabling better oxygen delivery throughout the body.
Bhujangasana strengthens the spine, opens the chest, and improves lung capacity, making breathing easier for asthma patients.
How to Practice:
- Place a yoga mat on the ground and lie on your stomach.
- Keep your toes flat against the ground while resting your forehead on the mat, and bring your feet close together so that your feet and heels are slightly touching.
- Place your hands palms-down on the ground under your shoulders, with your elbows parallel and close to your torso.
- Inhale and slowly raise your head, lifting your chest and abdomen while your navel remains pressed to the floor.
- Maintain steady breathing as you arch your back slowly, without jerking.
- Tilt your head back and gaze up.
- Continue to breathe evenly throughout the pose.
- Exhale and gently release the pose, bringing your chest, head, and abdomen back to the mat.
- Repeat several times.
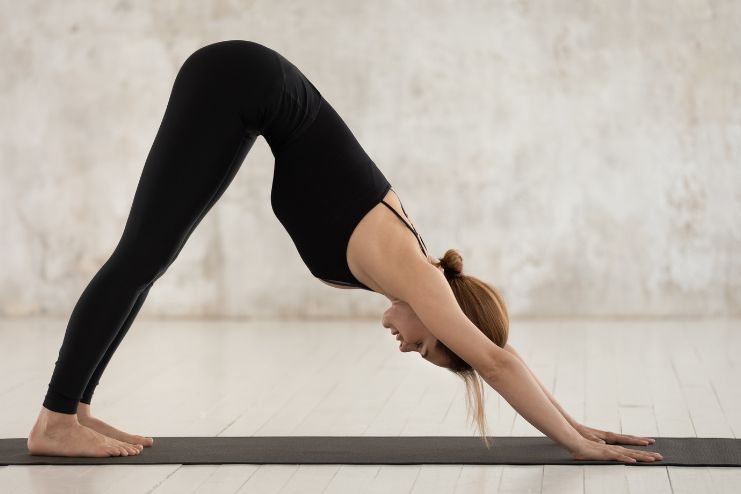
7. Adho Mukha Svanasana (Downward-Facing Dog Pose)
Etymology
- Adho – forward
- Mukha – face
- Svana – dog
- Asana – yoga pose
The Downward Dog pose works excellently in stretching and strengthening the body. It provides an ideal warm-up for the body and is safe to perform for injury prevention.
This pose works wonders in stretching your spine, toning muscles throughout your body, and revitalizing blood circulation. It calms the mind and helps relieve hyperventilation symptoms. Furthermore, it aids in delivering more oxygen to the body, purifying it while keeping asthma symptoms at bay—in other words, promoting healthy breathing.
How to Practice:
- Place your yoga mat down on the ground.
- Start in a tabletop position on your hands and knees.
- Exhale and lift the hips so that both knees and elbows are in a straight line to form an inverted V position.
- Align your hands shoulder-width apart and feet hip-width apart, ensuring both are parallel to each other.
- Press your palms firmly and actively spread your shoulder blades, bringing your ears to the inner arms.
- Look towards the navel and hold for a few breaths, inhaling deeply and exhaling slowly.
- Exhale and lower the hips back down to the starting tabletop position.
- Repeat the sequence a couple more times.
Also, Read: Chair Yoga for Seniors: Simple Moves to Improve Strength and Flexibility
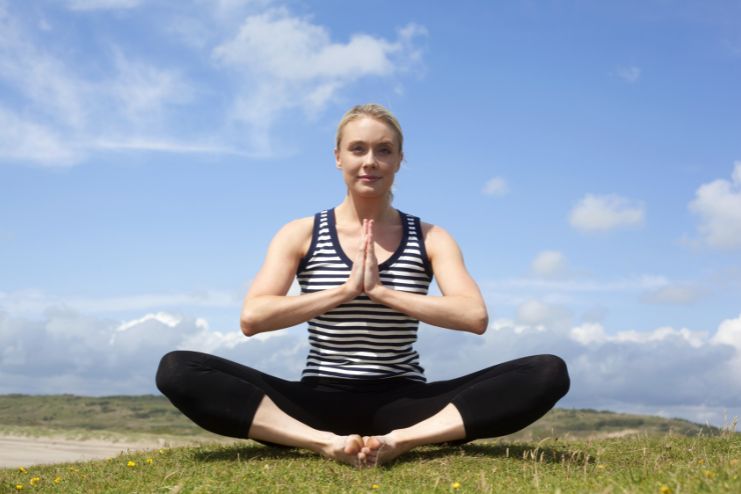
8. Badhakonasana (Bound Angle Pose)
Etymology
- Baddha – restrained
- Kona – angle
- Asana – yoga pose
Baddha Konasana, also known as the Butterfly Pose, is one of the most commonly recommended yoga asanas for managing asthma. It gets its name from the posture’s resemblance to a butterfly flapping its wings. Additionally, it is sometimes referred to as the Cobbler’s Pose due to its similarity to the sitting position of a traditional cobbler at work.
While it may not improve asthma symptoms directly, it indirectly helps control asthma by relieving fatigue, which is often an aggravator of asthma.
How to Practice:
- Settle yourself onto your yoga mat with your legs extended in front of you and your spine straight.
- Now gently bend your knees and bring your feet closer to your pelvis, allowing the soles of your feet to touch.
- Interlock your fingers and hold them over your feet to steady your position, or place your hands beneath your feet for support.
- Continuing in a gentle, steady manner, draw your heels toward your groin.
- Inhale through your nose and, while inhaling, apply gentle pressure through your thighs and knees downward.
- Now, begin to flap your legs like butterfly wings—slow at first, gradually increasing the speed. Breathe normally throughout this motion.
- Whenever you start to feel sore or uncomfortable, slow down, take a few seconds, and rest.
- Next, slowly lean forward slightly while keeping both your elbows and spine upright.
- Place your elbows on your thighs and gently press them down toward the floor, feeling the stretch in the inner thighs for a brief moment of relaxation.
- Breathe in and lift the torso upright.
- Exhale to ease out of the pose, and stretch your legs out in front of you to return to the starting position.
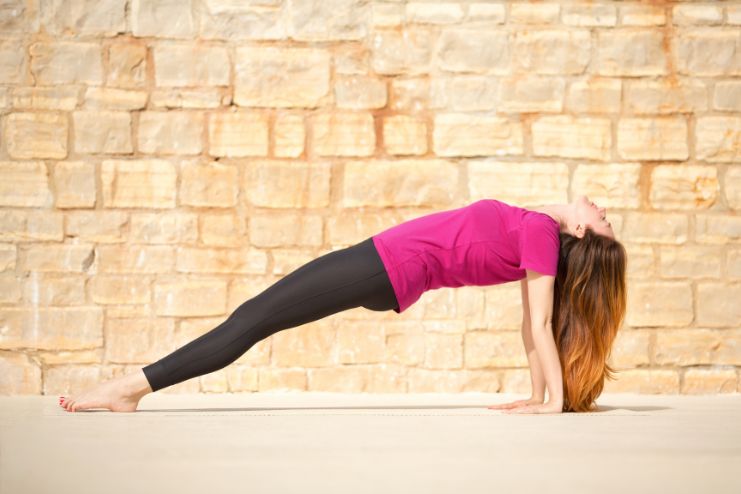
9. Poorvottanasana (Upward Plank Pose)
Etymology
- Poorva – East
- Uttana – Intense stretch
- Asana – Yoga pose
Poorvottanasana, also known as the Upward Plank Pose, is an intense stretch on the eastern (frontal) side of the body, symbolizing the flow of subtle pranic energy through this region. It is considered one of the most effective yoga asanas for asthma relief, as it strengthens and supports the respiratory system by expanding the chest and enhancing lung capacity.
This yoga pose has a direct impact on the functioning of the respiratory system, enhancing its efficiency, which plays a role in asthma therapy. It improves lung activity and supports proper breathing mechanics, which are often critical in managing asthma and related respiratory issues.
How to Practice:
- Spread the yoga mat on the ground and sit on it.
- Stretch your legs in front of you as far and straight as possible—imagine an erect, not bent, spine and feet just touching.
- Place both palms flat on the ground beside you, fingers pointing towards your feet for support.
- Lean slightly backward but keep the back from arching; the diaphragm should move, and the breath should be even.
- Transfer weight onto the hands, raise the pelvis off the floor, and straighten the body.
- Keep your knees straight but not hyperextended, with both feet flat on the floor.
- Stay in that posture for a couple of breaths, and then lower yourself down onto the mat.
- Do this a few more times.
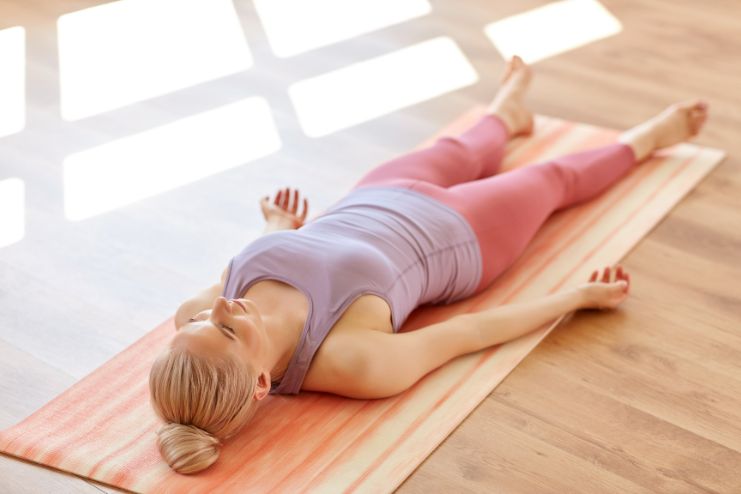
10. Savasana (Corpse Pose)
Etymology
- Sava – corpse
- Asana – yoga pose
Savasana is typically practiced at the end of a yoga session. Due to its deeply relaxing benefits, it is regarded as one of the best yoga poses for managing asthma. It brings the body into a meditative state where tissues and cells can repair.
Savasana has the power to completely calm and relax the mind. This allows the mind to expand, with an effortless and smooth flow of breath, providing a great release from the stress on the lungs and respiratory system.
How to Practice:
- You can practice with the yoga mat on the floor or without it. Cushions should not be used unless absolutely necessary.
- Completely relax the body, keeping the legs and arms slightly away from the body. The palms should face upward and be relaxed.
- Now, consciously relax every part of your body, paying attention to each area and slowly releasing any tension.
- Continue with deep breathing. Inhale and energize your body, exhale and relax. This is perhaps one of the deeper aspects of the practice, where you can entirely let go and flow without stress or thought.
- After 10 to 15 minutes, gently roll onto your right side and remain with your eyes closed for a few more minutes.
- Afterward, slowly sit up into Sukhasana and stay in the pose for a few moments. When you feel ready, gently open your eyes and don’t rush.
Also, Read: Finding Balance: Yoga and Meditation for Seniors’ Physical and Mental Health
Conclusion
Incorporating these yoga asanas and pranayama techniques into your daily routine can significantly improve respiratory function and overall well-being. However, it’s essential to consult with a healthcare provider before starting any new exercise regimen, especially if you have asthma or other health conditions.
Remember, yoga should complement, not replace, conventional asthma treatments. Always keep your prescribed medications accessible during practice and inform your yoga instructor about your condition.
![]()
References
- https://time.com/6156961/alternative-medicine-asthma
- https://yogayurchikitsa.com/breathe-easy-the-therapeutic-benefits-of-yoga-for-asthma-and-respiratory-disorders/
- https://rishikeshyognirvana.com/blog/asthma-yoga-treatments.php
- https://www.yogajournal.com/poses/nadi-shodhana/
- https://doctor.ndtv.com/living-healthy/yoga-for-asthma-5-yoga-asanas-to-relieve-asthma-symptoms-and-ease-breathing-2125188
- https://www.artofliving.org/in-en/yoga/yoga-sequences-for/effective-yoga-asanas-for-asthma
- https://pmc.ncbi.nlm.nih.gov/articles/PMC3017963/
In this Article

